The Ultimate Guide to
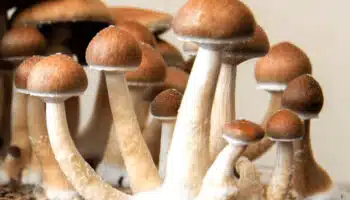
How to Grow Magic Mushrooms at Home
(Magic mushrooms, Shrooms, psilocybin)
Growing psilocybin mushrooms for consumption is a potentially illegal activity, and we do not encourage or condone this activity where it is against the law. However, we accept that people will grow psilocybin mushrooms, and believe that offering responsible harm reduction information is imperative to keeping people safe. For that reason, this guide is designed to ensure the safety of those who decide to grow psilocybin mushrooms.

This article has been medically reviewed by Katrina Oliveros, MSN-ED, BSN
Maria Katrina is a trauma-informed Wellness Educator and Psychedelic Harm Reduction Consultant. Beyond nursing, she supports health & wellness teams through medical aid, psychedelic harm reduction, and integration services.
Introduction
01BACKGROUND
This guide is based on Robert “Psylocybe Fanaticus” McPherson’s eponymous PF Tek—the method that revolutionized growing mushrooms indoors. McPherson’s key innovation was to add vermiculite to a grain-based substrate (as opposed to using grain alone), mimicking natural conditions and giving the mycelia more space to grow.
PF Tek’s low cost and reliability make it a great option for ambitious DIYers. However, before diving into this guide, you may want to consider an alternative method of growing mushrooms at home–one that beginners find simpler and less-labor intensive: mushroom grow kits.
MUSHROOM GROW KITS
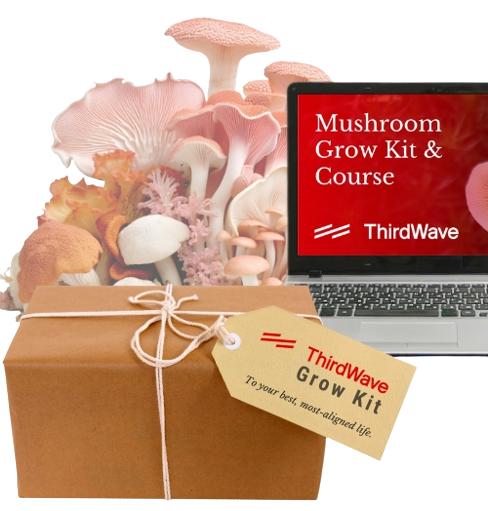
High-quality mushroom grow kits from reputable sources like Third Wave come with nearly everything required to cultivate at home. Notably, they provide pre-sterilized equipment and a ready-made substrate (soil equivalent), eliminating two lengthy and error-prone processes. (Read a first-time grower’s account of his Third Wave Mushroom Grow Kit experience.)
Because Third Wave’s Mushroom Grow Kit comes with all the tools you need, you won’t need to source materials elsewhere and can set up your grow space more efficiently. It also comes pre-packed with an LCD hygrometer so you can monitor humidity and temperature–elements that can make or break your harvest.
Watch how we grow mushrooms at home in the video below:

SPORE SYRINGES
Regardless of the mushroom grow method you choose–grow kit vs. PK Tek–you’ll need to source psilocybin spores to begin the process.
You might have some trouble getting a good spore syringe, which will contain your psilocybin mushroom spores and be used to “sow” them into your substrate. Some growers have reported issues of contamination, misidentified strains, and even syringes containing only water and no spores.
However, as long as you do your research and find a reputable supplier, you shouldn’t have any problems. (Read our recent article to learn more about how to find the right supplier when buying high-quality mushroom spores.)
In any case, after you’ve grown your first batch (or “flush”) of mushrooms, you can start filling syringes on your own (see part 4).

WHAT VARIETY SHOULD I CHOOSE?
As you begin to grow psilocybin mushrooms indoors, you’ll need to decide on a species and strain. Most suppliers offer a range to choose from, but the Psilocybe cubensis B+ and Golden Teacher mushrooms are among the most popular for beginners. While not as potent as some others, like Penis Envy, they’re reportedly more forgiving of sub-optimal and changing conditions.
introduction
Grow 1 Year's Worth of Microdoses in Just 6 Weeks
Third Wave partnered with top mycologists to create the world’s easiest and best mushroom growing program (kit, course, and expert support).
- Pre-sterilized and sealed
(ready to use out of the box) - Step-by-step video and text course
- Access to growing expert in community
- Make your first harvest in 4-6 weeks
- Average yield is 1 - 4 ounces (28-108g)
- Fits in a drawer or closet
- Enter info for Third Wave discounts:

Grow 1 Year's Worth of Microdoses in Just 6 Weeks
Third Wave partnered with top mycologists to create the world’s easiest and best mushroom growing program (kit, course, and expert support).
- Pre-sterilized and sealed
(ready to use out of the box) - Step-by-step video and text course
- Access to experts in community
- Make your first harvest in 4-6 weeks
- Average yield is 1 - 4 ounces (28-108g)
- Fits in a drawer or closet
- Enter info for Third Wave discounts
What You Will Need
02INGREDIENTS
- Spore syringe, 10-12 cc
- Organic brown rice flour
- Vermiculite, medium/fine
- Spring water
EQUIPMENT
- 12 shoulderless half-pint jars with lids (e.g., Ball or Kerr jelly or canning jars)
- Hammer and small nail
- Measuring cup
- Mixing bowl
- Strainer
- Heavy-duty aluminum foil
- Large cooking pot with a tight lid, for steaming
- Small towel (or approx. 10 paper towels)
- Micropore tape
- Clear plastic storage box, 50-115L
- Drill with quarter-inch drill bit
- Perlite
- Mist spray bottle
HYGIENE SUPPLIES
- Rubbing alcohol
- Butane/propane torch lighter
- Surface disinfectant
- Air sanitizer
- Sterilized latex gloves (optional)
- Surgical mask (optional)
- Still air or glove box (optional)
Instructions
03NOTE: Always ensure good hygiene before starting: spray an air sanitizer, thoroughly disinfect your equipment and surfaces, take a shower, brush your teeth, wear clean clothes, etc. You don’t need a lot of space, but your environment should be as sterile as possible. Opportunistic bacteria and molds can proliferate in conditions meant for cultivating psilocybin mushrooms, so it’s crucial to minimize the risk.

STEP 1: PREPARATION
1) Prepare jars:
- With the hammer and nail, which should be disinfected by wiping with alcohol, punch four holes down through each of the lids, evenly spaced around their circumferences.
2) Prepare substrate:
- For each jar, thoroughly combine ⅔ cup vermiculite and ¼ cup water in the mixing bowl. Drain excess water using the disinfected strainer.
- Add ¼ cup brown rice flour per half-pint jar to the bowl, and combine with the moist vermiculite.
3) Fill jars:
- Being careful not to pack too tightly, fill the jars to within a half-inch of the rims.
- Sterilize this top half-inch with rubbing alcohol
- Top off your jars with a layer of dry vermiculite to insulate the substrate from contaminants.
4) Steam sterilize:
- Tightly screw on the lids and cover the jars with tin foil. Secure the edges of the foil around the sides of the jars to prevent water and condensation from getting through the holes.
- Place the small towel (or paper towels) into the large cooking pot and arrange the jars on top, ensuring they don’t touch the base.
- Add tap water to a level halfway up the sides of the jars and bring to a slow boil, ensuring the jars remain upright.
- Place the tight-fitting lid on the pot and leave to steam for 75-90 minutes. If the pot runs dry, replenish with hot tap water.
NOTE: Some growers prefer to use a pressure cooker set for 60 minutes at 15 PSI.
5) Allow to cool:
- After steaming, leave the foil-covered jars in the pot for several hours or overnight. They need to be at room temperature before the next step.
STEP 2: INOCULATION
1) Sanitize and prepare syringe:
- Use a lighter to heat the length of your syringe’s needle until it glows red hot. Allow it to cool and wipe it with alcohol, taking care not to touch it with your hands.
- Pull back the plunger a little and shake the syringe to evenly distribute the psilocybin mushroom spores.
NOTE: If your syringe and needle require assembly before use, be extremely careful to avoid contamination in the process. Sterilized latex gloves and a surgical mask can help, but the surest way is to assemble the syringe inside a disinfected still-air or glove box.
2) Inject spores:
- Remove the foil from the first of your jars and insert the syringe as far as it will go through one of the holes.
- With the needle touching the side of the jar, inject approximately ¼ cc of the spore solution (or slightly less if using a 10 cc syringe across 12 jars).
- Repeat for the other three holes, wiping the needle with alcohol between each use.
- Cover the holes with micropore tape and set the jar aside, leaving the foil off.
- Repeat the inoculation process for the remaining jars, sterilizing your needle with the lighter and then alcohol between each inoculation.
STEP 3: COLONIZATION
1) Wait for the mycelium:
- Place your inoculated jars somewhere clean and out of the way. Avoid direct sunlight and temperatures around 70-80°F (room temperature).
- White, fluffy-looking mycelium should start to appear between seven and 14 days, spreading outward from the inoculation sites.
NOTE: Watch out for any signs of contamination, including strange colors and smells, and dispose of any suspect jars immediately. Do this outside in a secure bag without unscrewing the lids. If you’re unsure about whether a jar is contaminated, always err on the side of caution—even if the substrate is otherwise healthily colonized—as some contaminants are deadly.
2) Consolidate:
- After three to four weeks, if all goes well, you should have at least six successfully colonized jars. Leave for another seven days to allow the mycelium to strengthen its hold on the substrate.
STEP 4: PREPARING THE GROW CHAMBER
1) Make a shotgun fruiting chamber:
- Take your plastic storage container and drill quarter-inch holes roughly two inches apart all over the sides, base, and lid. To avoid cracking, drill your holes from the inside out into a block of wood.
- Set the box over four stable objects, arranged at the corners to allow air to flow underneath. You may also want to cover the surface under the box to protect it from moisture leakage.
NOTE: The shotgun fruiting chamber is far from the best design, but it’s quick and easy to build and does the job well enough for beginners. Later, you may want to try out alternatives.
2) Add perlite:
- Place your perlite into a strainer and run it under the cold tap to soak.
- Allow it to drain until there are no drips left, then spread it over the base of your grow chamber.
- Repeat for a layer of perlite roughly 4-5 inches deep.
STEP 5: FRUITING
1) “Birth” the colonized substrates (or “cakes”):
- Open your jars and remove the dry vermiculite layer from each, taking care not to damage your substrates, or “cakes,” in the process.
- Upend each jar and tap down onto a disinfected surface to release the cakes intact.
2) Dunk the cakes:
- Rinse the cakes one at a time under a cold tap to remove any loose vermiculite, taking care not to damage them.
- Fill your cooking pot or another large container with tepid water, and place your cakes inside. Submerge them just beneath the surface with another pot or similarly heavy item.
- Leave the pot at room temperature for up to 24 hours, so the cakes rehydrate.
3) Roll the cakes:
- Remove the cakes from the water and place them on a disinfected surface.
- Fill your mixing bowl with dry vermiculite.
- Roll your cakes one by one to fully coat them in vermiculite. This will help to keep the moisture in.
4) Transfer to grow chamber:
- Cut a tin foil square for each of your cakes, large enough for them to sit on without touching the perlite.
- Space these evenly inside the grow chamber.
- Place your cakes on top and gently mist the chamber with the spray bottle.
- Fan with the lid before closing.
5) Optimize and monitor conditions:
- Mist the chamber around four times a day to keep the humidity up, taking care not to soak your cakes with water.
- Fan with the lid up to six times a day, especially after misting, to increase airflow.
NOTE: Some growers use fluorescent lighting set on a 12-hour cycle, but indirect or ambient lighting during the day is fine. Mycelium only needs a little light to determine where the open air is and where to put forth mushrooms.
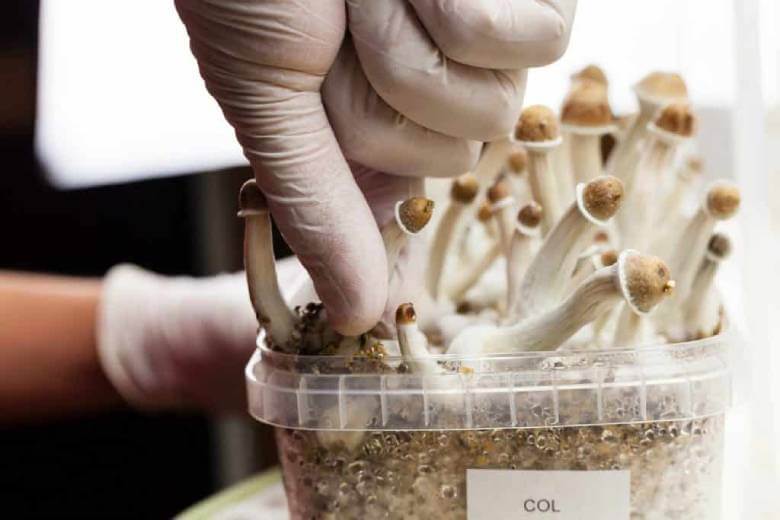
STEP 6: HARVESTING
1) Watch for fruits:
- Your mushrooms, or fruits, will appear as tiny white bumps before sprouting into “pins.” After 5-12 days, they’ll be ready to harvest.
2) Pick your fruits:
- When ready, cut your mushrooms close to the cake to remove them. Don’t wait for them to reach the end of their growth, as they’ll begin to lose potency as they further mature.
NOTE: The best time to harvest mushrooms is right before the veil breaks. At this stage, they’ll have light, conical-shaped caps and covered gills.
Third Wave partnered with top mycologists to create the world’s easiest and best mushroom growing program (kit, course, and expert support). Third Wave partnered with top mycologists to create the world’s easiest and best mushroom growing program (kit, course, and expert support). Grow 1 Year's Worth of Microdoses in Just 6 Weeks
(ready to use out of the box)Grow 1 Year's Worth of Microdoses in Just 6 Weeks
(ready to use out of the box)
What Next?
04STORAGE
Fresh psilocybin mushrooms hold their potency best when they’re stored in dark places at room temperature. So if you plan to use them for microdosing or you just want to save them for later, you’ll need to think about storage. The most effective method for long-term storage is drying. This should keep them potent for two to three years as long as they’re kept in a cool, dark, dry place. If they’re stored in the freezer, they’ll pretty much last indefinitely.
The lo-fi way to dry your mushrooms is to leave them out on a sheet of paper for a few days, perhaps in front of a fan. The problem with this method is they won’t get “cracker dry.” That is, they’ll still retain some moisture and won’t snap when you try to bend them. Their potency may also significantly diminish, depending on how long you leave them out.
Using a dehydrator is by far the most efficient drying method, but it can be expensive. A good alternative is to use a desiccant as follows:
- Air dry your mushrooms for 48 hours, ideally with a fan.
- Place a layer of desiccant into the base of an airtight container. Readily available desiccants include silica-gel kitty litter and anhydrous calcium chloride, which you can purchase from a hardware store.
- Place a wire rack or similar set-up over the desiccant to keep your mushrooms from touching it.
- Arrange your mushrooms on the rack, ensuring they’re not too close together, and seal the container.
- Wait for a few days, then test to see if they’re cracker dry and snap easily.
- Transfer to storage bags (e.g. vacuum-sealed Ziploc) and place in the freezer.
REUSING THE SUBSTRATE
After your first flush, the same cakes can be reused up to three times. Simply dry them out for a few days and repeat Step 5.2 above (dunking). But don’t roll them in the vermiculite. Just place them back in the grow chamber and mist and fan them as before. When you start to see contaminants (usually around the third reuse), drench the cakes with the mister spray and dispose of them outside in a secure bag.
MAKING SPORE SYRINGES
Filling your own psilocybin spore syringes is about as self-sufficient as this process gets.
First, you’ll need to take a spore print from a mature mushroom, i.e., one that’s been allowed to grow until its cap has opened out and the edges are upturned. You should also notice an accumulation of dark purple deposits around the base. These are the psilocybin mushroom spores.
To collect the spores, remove the cap with a flame-sterilized scalpel and place it gills-down on a sterile paper sheet. Cover with a disinfected glass or jar to protect it from the air and leave for 24 hours. Keep the resulting spore print out of the light in an airtight plastic bag.
To load a spore syringe, scrape some of the spore print into a sterile glass of distilled water. You can find this at auto-supply stores. Then fill your syringe, which should also be sterile, and empty it back into the glass several times to evenly distribute the spores. Fill it a final time and place it inside an airtight plastic bag. Leave at room temperature for a few days to allow the spores to hydrate. You can then keep the syringe in the fridge until you’re ready to use it. This should last at least two months.
ADAPTATIONS AND ALTERNATIVES
Numerous modifications have been made to the PF Tek method to increase yield and make things easier. Different species also tend to produce better with different substrates and growing conditions.
The main alternative to the basic PF Tek is the monotub method, which involves spawning to bulk on coir (coconut fiber extract), manure, straw, or some other fresh and nutritious substrate. Eventually, you may want to experiment with some of these other methods, but the PF Tek is a good introduction for now.
FAQ
05How long does it take to grow magic mushrooms at home?
The time it takes for your mycelium-colonized substrate to put forth harvestable fruits depends on several factors. But the whole process of cultivating mushrooms should take between one and two months.
Want to learn how to grow your own mushrooms from home? Check out Third Wave’s Mushroom Grow Kit
When to harvest psilocybin shrooms?
You should be able to harvest your fruits five to 12 days after they first begin to sprout from the mushroom substrate.
The trick is to harvest them before the veil breaks, i.e., before they fully mature and release their spores. In other words, the gills should still be covered. At this stage, your mushrooms should also have light, conical caps.
How to make a spore syringe?
We’ve included instructions for making a spore syringe above. You’ll need a sterilized knife or scalpel, a sterile paper sheet, and a disinfected glass or jar to gather psilocybin spores from a mushroom that’s been allowed to mature. Add the mushroom spores to a glass of distilled water and load your sterile syringe from that. After leaving it at room temperature for a few days to hydrate, you can store it in the fridge for at least a couple of months.
How to grow psilocybin mushrooms at home without spores?
Use a Psilocybe cubensis grow kit if you don’t want to add the mushroom spores yourself. The typical P. cubensis grow kit comes with an already colonized substrate for growing mushrooms in a box. They’re available for different P. cubensis varieties, as well as different species.
What is the best mushroom substrate?
Although tried and tested by generations of mushroom growers, the brown rice flour and vermiculite substrate may not be the best choice for everyone. It depends on your priorities. Brown rice flour is good for growing in bulk, but coir (coconut fiber extract) may be cheaper and easier to use. Then there’s whole brown rice (not flour), which supposedly yields more potent fruits.
Pasteurized horse manure is another good option since it’s high in phosphorus, nitrogen, and potassium And throwing spent coffee grounds into the mix (up to a quarter of the whole) could help speed up colonization. Coffee grounds are economical too. Ninety-nine percent of coffee biomass that doesn’t end up in the cup is usually just thrown away.
Some growers say the best mushroom substrate is crammed full of nutritional diversity. However, too many nutrients from too many different sources can lead to contamination. As a beginner, you’re better off keeping things simple–not to mention inexpensive enough for trial and error.
What’s the difference between psilocybin mushroom spawn and substrate?
As you learn more about growing mushrooms indoors, you’re likely to see the terms “spawn” and “substrate” used seemingly interchangeably or just incorrectly.
Put simply, “substrate” (the brown rice flour/vermiculite cakes in the PF Tek method) becomes “spawn” if it’s used to colonize a second bulk substrate made of coir, manure, etc., in the fruiting chamber.
If you’re fruiting directly from the cakes, as this guide directs, your mushroom substrate remains the “substrate,” even after removal from the jars.
You can purchase spawn, substrate, and casing kits through Third Wave’s Mushroom Grow Kit.
What are the best Psilocybe cubensis strains?
As mentioned in the guide, some of the most popular P. cubensis strains (or varieties) for beginners are the B+ and Golden Teacher mushrooms. Experienced growers may prefer Penis Envy.
However, as with your choice of substrate, the best P. cubensis strain for you will depend on your priorities for cultivating mushrooms. See here and here for more information.
How to grow magic truffles?
Forget about growing mushrooms in a box! Truffles are often grown in jars instead of a fruiting chamber. See this guide for details. Another key difference from the PF Tek method is the use of a boiled rye grain (aka rye berries) substrate.
Popular truffle varieties include Psilocybe mexicana and P. tampanensis, also known as “philosopher’s stones.”
Where can I find supplies for growing mushrooms?
One of the great things about the PF Tek method is that supplies are widely available. What you haven’t already got lying around the house can be found at your local hardware store.
Alternatively, you might consider a prepackaged option that doesn’t require materials sourcing. For example, Third Wave’s Mushroom Grow Kit arrives with nearly everything you need and is 100% sterilized to avoid contamination risks.
You’ll only need a specialist supplier for your first load of psilocybin spores. Here is a reference for finding high-quality spores from reputable suppliers.
Useful Links
06What’s it like to take Psilocybin Mushrooms?
How to prepare Psilocybin Mushrooms for microdosing
Third Wave’s Mushroom Grow Kit & Course
This blog article uses affiliate links. Third Wave receives a small percentage of the product price if you purchase through any affiliate links. Read our ethics and affiliates policy here.