This article has been medically reviewed by Katrina Oliveros, MSN-ED, BSN
Maria Katrina is a trauma-informed Wellness Educator and Psychedelic Harm Reduction Consultant. Beyond nursing, she supports health & wellness teams through medical aid, psychedelic harm reduction, and integration services.
Despite being some of the oldest known living organisms on planet earth (dating back approximately 1.5 billion years), the Kingdom of Fungi was actually only classified in 1969, and to this day much about this branch of biology’s tree of life is unknown.
A prime example of our lack of knowledge regarding fungi is that we still have no idea why an entire genus of mushroom has evolved to produce alkaloids that drastically (and most would argue beneficially) affect human consciousness.
The study of fungi is known by biologists as “mycology”, and it has been a science since the late 1830s. For nearly 200 years, scientists and researchers across the world have devoted themselves to learning how organisms in Kingdom Fungi (of which mushrooms/basidiomycota are a phylum) survive, reproduce, and evolve. Paul Stamets is one of the world’s leading mycologists whose books, talks, and website Fungi Perfecti have helped shed significant light on the topic.
Mycology is a very broad subject, but today we are going to focus on an overview of what Spores Lab has found to be the most effective mushroom growing process to cultivate Psilocybe Cubensis mushrooms (magic mushrooms).
Before we get into the specifics of DIY indoor mushroom farming, let’s begin by explaining the basics of a mushroom’s life cycle under natural conditions, and touch on a few of the most important things that you must be cognizant of when cultivating mushrooms.
Mushroom growth cycle
Mushrooms of all kinds—including shiitake, oyster mushrooms, white button mushrooms and magic mushrooms—all begin and end (under natural conditions) as spores.
Mushroom spores are tiny (typically one-celled) reproductive units that contain the entire genetic code of the mushroom that produced them. If spores are successfully dispersed in a suitable environment, they will germinate and form what is called “mycelium”.
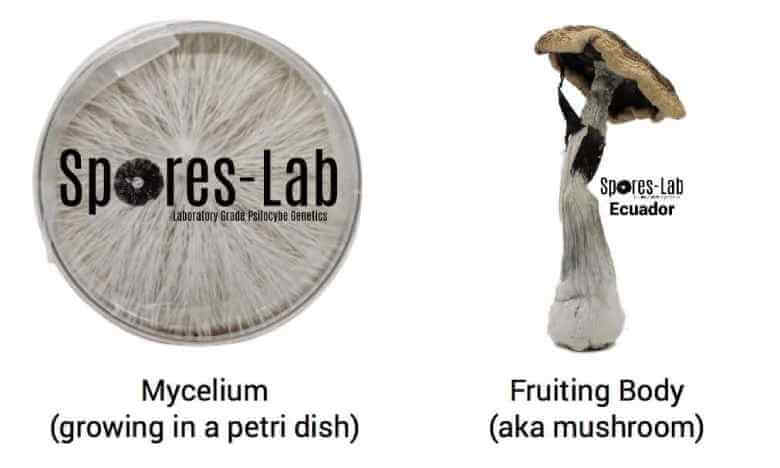
Mushroom mycelium consists of a mass of branching root-like strands, each strand a single cell thick, called hyphae. Mycelium can be described as the vegetative portion of the fungal life cycle (where all nutrients and energy are put towards growth instead of reproduction). This part of the life cycle (where mycelium is growing but no mushrooms are present) is often called “spawning” or “colonization”.
The next step in the mushroom life cycle happens once the mycelium has fully “colonized” the area in which it is growing. At this point, changes in environmental conditions (like temperature and humidity) or changes in the availability of nutrients will trigger the mushroom mycelium to switch from a “spawning” state to a “fruiting” state. It is in this fruiting state that fruiting bodies (mushrooms) grow out of the mycelial mat. This is actually the fungal organisms’ way of reproducing, creating mushrooms that drop spores which can be carried on air currents for kilometers.
Explained above is a very basic overview for first time mushroom growers about this fungi’s lifecycle under natural growing conditions, but when growing magic mushrooms in an artificial environment a few other factors come into play. When you cultivate magic mushrooms—or any edible mushrooms like portobello, lion’s mane, reishi, and maitake—indoors, you aim to create a perfect environment for fungal growth.
Unfortunately, this environment is also ideal for bacterial spread, or the spread of other unwanted fungi. You must take extreme care to clean/disinfect all of the surfaces, tools, and body parts that will come into contact, or even come near, your mushroom culture. The need for sterility is also why mushroom spawn media must be cooked in a pressure cooker. Ultimately, sterility is the most important thing to be cognizant of during not only the spawn run, but for the entire duration of your grow.
That’s not to say it’s unnecessarily labor-intensive to grow your own mushrooms at home. In fact, it’s quite easy and requires very little input. By simply designating an area and cleaning it thoroughly before starting your indoor mushroom farm culture (whether using a spore syringe, a liquid culture syringe, or a mushroom grow kit), you will be at a huge advantage.
Ready to learn from leading mycologists how to grow your own mushrooms from home?
Third Wave’s How to Grow Mushrooms Course and Grow Kit turn the daunting task of cultivating mushrooms into a simple one.
Our in depth guide and step-by-step videos will have you harvesting your own home-grown mushrooms in no time.
Mushroom Cultivation Process
STEP 1: Preparing Your Mushroom Spawn Medium
The first step in growing mushrooms is not actually inoculating a growing medium with mushroom genetics, but instead is properly preparing the medium.
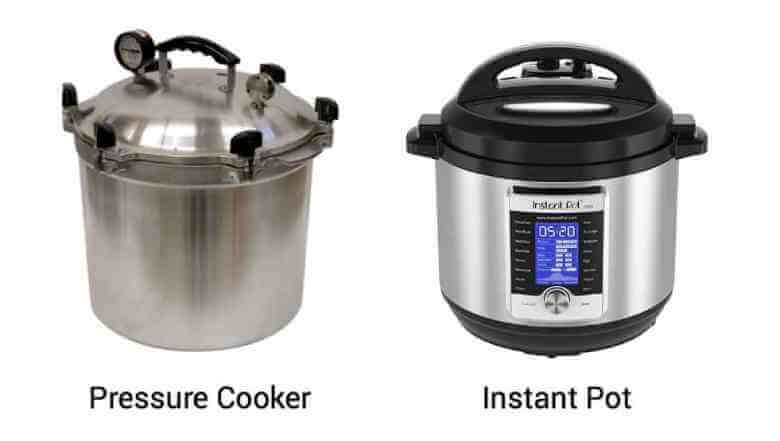
To ensure no competitor fungi will grow in the same medium, you must first kill absolutely everything living in/on that medium. This is typically done using a pressure cooker, but an instant pot can be used as well.
Even the pressure cooker/instant pot/autoclave cannot kill certain endospores, so you must also soak the grain in water beforehand, which makes these endospores germinate, allowing you to kill them during the sterilization process. Soaking also serves to provide water, which mycelium needs to live.
Several different spawn media can be used, but the best medium is Organic Rye grain berries. Rye is the best because it can hold more water than any other grain, and this will translate to higher yield during fruiting.
- Begin by placing the grain in a bucket, then fill the bucket with cold water and pour out the water (just the water) several times until the water is pouring clear.
- Fill the bucket 6-8” above the grain level and leave the grain to soak for 18-24 hours.
When you return (18-24 hours later) the water level will have dropped significantly, meaning the grain has absorbed moisture. Pour out the remaining water and fill the bucket 6” above the grain level, this time with HOT water, as hot as you can make it out of a tap. Many other how-to’s instruct to add boiling water at this point, however just hot water will work fine and will minimize the amount of grains that split open.
- Let the grain sit in hot water for 15 minutes.
- After 15 minutes, pour out the hot water and strain with a colander.
- Let the grain dry in the colander for 15-30 minutes, mixing occasionally to ensure even drying.
- Place the grain in a mason jar or an autoclavable plastic jar, put the lid on the jar, and begin a pressure cooking cycle.
Cook the grain at 15PSI for 150 minutes (2.5 hours) or use the “sterilize” setting on the instapot. If your sterilizer does not have the capacity to pressurize to 15PSI, add 0.5 hours to the cook time for every 1PSI below 15PSI (for example if your cooker only pressurizes to 13.7PSI—which is common— then cook for 180 minutes (3 hours).
STEP 2: Inoculation
After you have removed the jars or bags from the sterilizer (and let them cool!), you are now ready to inoculate!
Inoculation should be done within 24 hours of sterilization. This is because of the finite amount of moisture in the grain, moisture which has to last the entire life cycle. You will not only lose out on potential yield if you wait too long to inoculate, but you will also be giving the mycelium a more difficult (dryer) environment to grow in.
Begin by cleaning, and don’t be afraid to “overkill” for this step, as it’s this point where the risk of contamination is greatest. Wipe down the surface of the syringe, the surface of the spawn container, your hands, your arms, and all surfaces in the area with disinfectant.
If using a Still Air Box (SAB), place all supplies in the box, then put the lid on the box, put your hands in the gloves, and liberally disinfect the interior of the box with an aerosol disinfectant spray.
Consider wearing a face mask and tying your hair up if you have long hair.
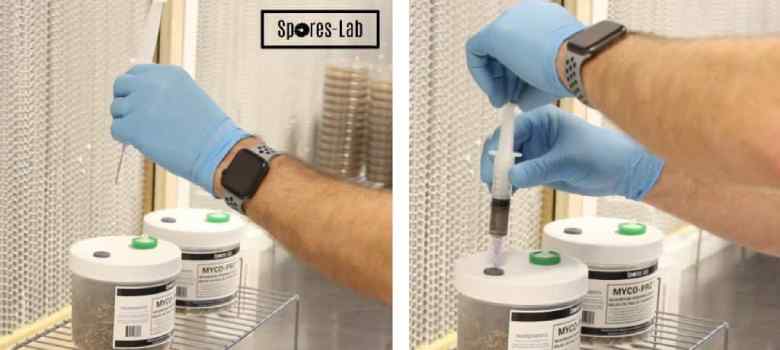
The actual process of inoculation is very quick and easy, simply:
- Unwrap the sterile needle (which is usually included in spore syringe or liquid culture syringe kits)(keep the needle end in the plastic).
- Remove the plastic tip from the syringe.
- Attach the needle to the syringe.
- Sterilize the needle (with either heat or disinfectant).
- Inject the needle into the inoculation port and press the plunger of the syringe.
If you do not have an inoculation port lid, we recommend drilling a small hole in the lid of the container. (If you are using a bag, then the needle can be used to poke a hole in the bag). Cover this hole with Micro-pore tape during sterilization and after inoculation.
We recommend inoculating with at least 5cc/mL of spore or liquid culture solution for a container roughly 1L in volume. That will result in a colonization time of approximately one month, if you can provide the correct conditions for mycelial growth. Each litre of spawn will result in approximately three ounces of dried mushroom.
STEP 3: Colonization
After you inoculate, shake the container gently to disperse the liquid culture or spore solution, and then leave the container in an environment that has the right conditions for colonization.
Colonize in an area that is dark, has about 55% ambient humidity, and has steady temperature between 75-77F (24-25C). It’s important that temperature remains below 80F (26.5C) during colonization.
If at any point during the colonization period, you notice a pungent odor coming from the container, or notice any coloration that is NOT white mycelial growth, quarantine that container from the rest of your operation immediately and dispose of it. It has likely become contaminated and if you do not remove it from the area, it will contaminate the containers around it. Check out the Spores Lab resources page for examples of common contaminants.
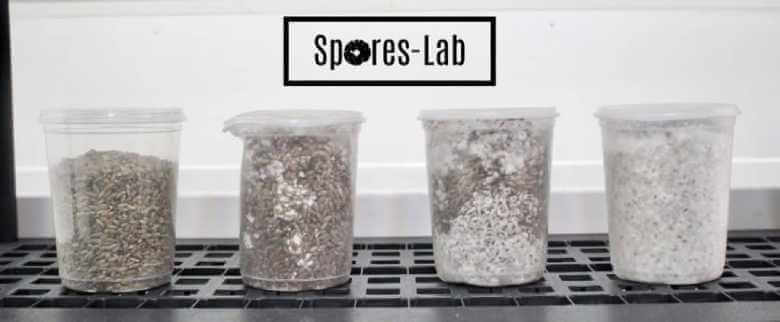
The mycelium is “fully” colonized when you are barely able to see grain, and the majority of the jar or plastic bag is a solid block of mycelium.
Grow 1 Year's Worth of Microdoses in Just 6 Weeks
Third Wave partnered with top mycologists to create the world’s easiest and best mushroom growing program (kit, course, and expert support).
- Pre-sterilized and sealed
(ready to use out of the box) - Step-by-step video and text course
- Access to growing expert in community
- Make your first harvest in 4-6 weeks
- Average yield is 1 - 4 ounces (28-108g)
- Fits in a drawer or closet
- Enter info for Third Wave discounts:
Grow 1 Year's Worth of Microdoses in Just 6 Weeks
Third Wave partnered with top mycologists to create the world’s easiest and best mushroom growing program (kit, course, and expert support).
- Pre-sterilized and sealed
(ready to use out of the box) - Step-by-step video and text course
- Access to experts in community
- Make your first harvest in 4-6 weeks
- Average yield is 1 - 4 ounces (28-108g)
- Fits in a drawer or closet
- Enter info for Third Wave discounts
STEP 4: Preparing Substrate Medium
Once your spawn medium is fully colonized, you are now ready to add a high water-retention fruiting substrate, which will also allow more surface area for mushrooms to form on. Debate has raged for decades among the entheogenic mycology community on what is the best substrate, and there have been many zany experiments with the dung of an exotic creature.
However, if you are looking for some degree of consistency, we recommend staying away from manure and instead providing the same nutrients using substitute inputs that have greater consistency.
If you’re growing outdoors, materials like wooden logs, hardwood sawdust, and wood chips can work well for strains like reishi, Lion’s mane, shiitake, maitake, and king oyster.
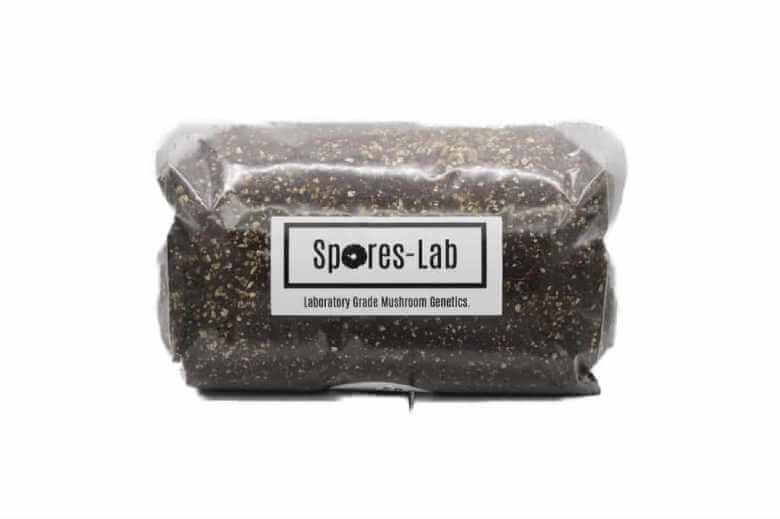
Ultimately, the substrate you choose will depend on the types of mushrooms you want to grow and where you want to grow them. But for indoor psilocybe mushroom cultivation, we have found the best results using a mix of vermiculite, coconut coir, calcium carbonate (hydrated lime), peat moss, and worm castings.
You can also supplement 5% or less of your substrate with materials like coffee grounds. This mix provides excellent water retention and nutrients, and is ph balanced slightly basic, which is perfect for fungal growth.
Begin by mixing the vermiculite and coconut coir at a 50/50 ratio. Next, add 5L of peat moss, 1L of worm castings, and 1/2 cup of calcium carbonate for every 40L of verm/coco mix.
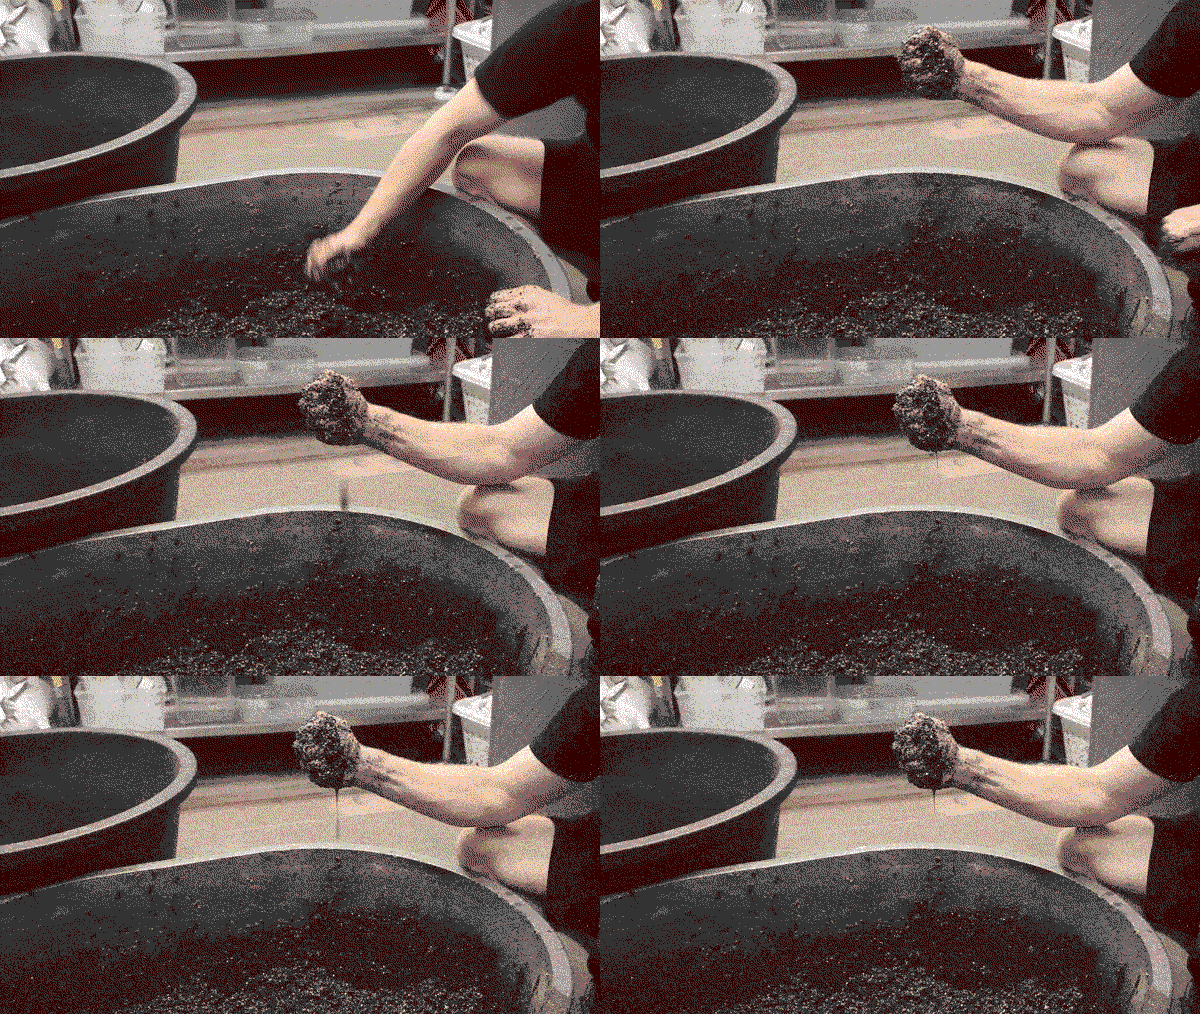
Now add 1L of water for every 10L of dry mix, and mix well. Keep mixing and adding more water until the medium drips a steady stream of water slightly when lightly squeezed. The reason we recommend starting with 1L of water for every 10L of mix, then adding water as needed, is due to variance in the ingredients from different suppliers.
When the proper water content has been achieved, the mixture should drip a steady stream of water when lightly squeezed (this is called field capacity). When field capacity is reached, place the substrate in a Type 14A 0.5 micron filter autoclavable or similar bag that can withstand pasteurization/sterilization.
Unlike spawn medium, you can either pasteurize OR sterilize the fruiting substrate. Pasteurization can be done via steam or via a conventional oven. We recommend using a conventional oven and cooking the medium at 180F for six hours.
After the cook is complete, let the bag cool for approximately six hours, and when it is cool to the touch, you are ready to mix it with your spawn.
STEP 5: Mixing Spawn & Substrate
Although by this point the mushroom culture is established and can fight off potential contaminants, sterility is still very important and overkill doesn’t hurt.
Wipe down the surface of the colonization bag/jar, the surfaces of the tray/tub/tote that you will fruit in, your tools, your hands and arms, and the surface of the bag that the fruiting medium was sterilized in.
Position your supplies so that you don’t have to reach over the mushroom culture to grab them, and don’t position them in between the culture and flow hood, which helps keep mold spores, bacteria, and other contaminants from infecting your spawn.
We recommend a mixing ratio of 25% spawn and 75% substrate. To properly size your growing tub/chamber, a ratio of approximately 1:5 (growing medium volume to growing chamber volume) is best. For example, if you use 1L of spawn and 3L of substrate, a chamber about 20L in volume will be suitable.
Begin by putting on your PPE (gloves, mask, hairnet), and cleaning the surfaces of the spawn container, fruiting container, and fruiting substrate bag, all surfaces in the area, and your tools, then spray a mist of disinfectant in the air.
Gather your supplies and place them intelligently so you can work quickly and get a lid on the container.
- OPTIONAL – Place the fruiting container in a black plastic garbage bag (this makes cleanup at the end of the growing cycle easier, and also prevents mushrooms from pinning on the sides or bottom of the container).
- Cut along the top of the fruiting substrate bag and pour into the container.
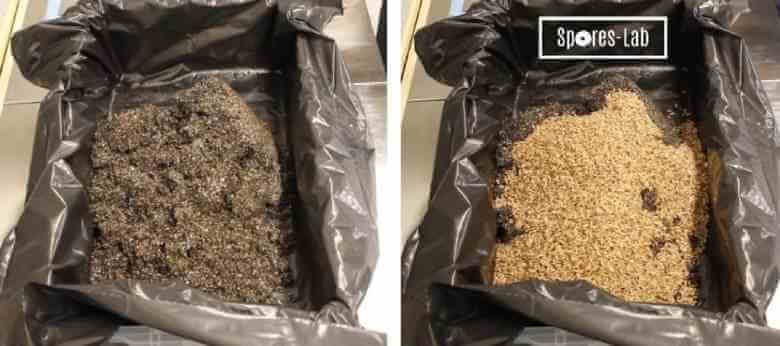
- Empty the spawn container into the fruiting container.
Mix the two media well. You want the spawn to be as well dispersed as possible to allow optimal and even colonization of the substrate in the shortest amount of time.
After the substrate is mixed well, tamp the surface lightly with a (disinfected) BBQ flipper so it is as flat as possible. This is to avoid water pooling during colonization of the substrate.
Now, put the lid on the container and mark the date, strain, and any other relevant information on the exterior of the container.
STEP 6: INCUBATION
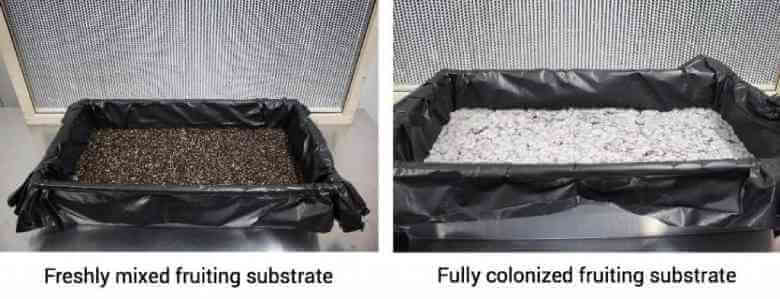
After you build your fruiting substrate, leave the tub/chamber in an environment that has the right conditions for colonization/incubation, and your spawn will expand into this new medium, creating a much larger surface area for mushrooms to form on, and therefore more yield!
Colonization should take place in an area that is dark, has about 55% ambient humidity, and has steady temperature between 75-77F (24-25C). It is crucial that the temperature remains below 80F (26.5C) during colonization.
You should also check the colonizing tray/tub/tote periodically to make sure there is no water pooling on the surface of the fruiting substrate. If water is pooling, remove the lid, wipe any water collecting on the lid, put the lid back on, and lower the ambient humidity.
Colonization will take between seven and ten days.
If at any point during the colonization period you notice a pungent odor coming from the tub/tray/tote, or notice any discoloration that is NOT white mycelial growth, quarantine that tray/tub/tote from the rest of your operation immediately and dispose of it. It has likely become contaminated and if you do not remove it from the area, it will contaminate the trays/tubs/totes around it.
The fruiting substrate is fully colonized when the surface of the substrate is completely white with mycelium.
STEP 7: Triggering Fruiting
Once the fruiting substrate is fully colonized, you are now ready to trigger the fruiting period by changing the environmental conditions.
Basically, what you are doing here is tricking the mycelium into thinking that it is dying, and prompting it to reproduce. The three major changes you will make are to the humidity level, the light schedule, and the oxygen level.
These changes mimic the natural environmental changes that occur when a mycelial culture reaches the “edge” of the medium it is colonizing. A good analogy is a compost pile. When mycelium begins life deep inside the compost pile, it is in a dark and high CO2 (low oxygen) environment.
As it grows towards the edge of the pile, it is exposed to light and higher oxygen levels, which triggers mushrooms to form.
Adding humidity also serves to trigger pinning (this is why you often see mushrooms after rainfall), and additionally can extend the fruiting period by providing moisture for the culture to absorb, as fruiting bodies are almost all water.
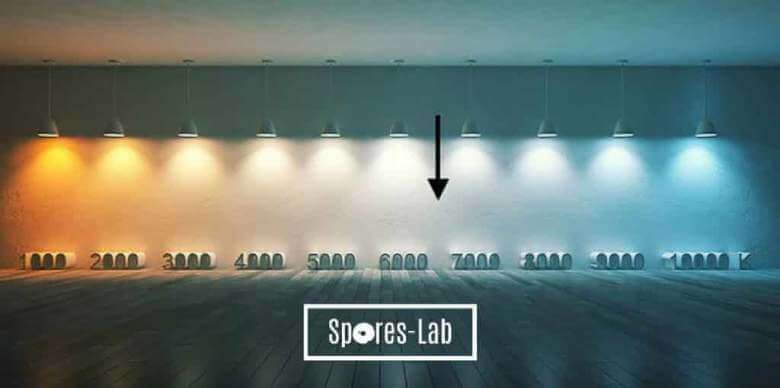
First, you should switch from a constantly dark environment to a 12/12 light cycle (12 hours light, 12 hours dark). Any light spectrum will work, however slightly “cooler” lighting between 6000 and 7000 Kelvin is ideal.
Second, you should switch or modify the lid of the fruiting container to allow more airflow to the culture.
Using the same container that you built the fruiting substrate in, flipped upside down, usually works well. Cut a 2” hole in each corner of the dome and stuff this hole with Hi-loft polyfil. This serves as a barrier for particulate matter/contaminants but allows airflow.
We also use plastic clips to hold the dome to the tray.
Finally, you should raise humidity in the fruiting chamber by misting the surface of the fruiting substrate whenever there is NO humidity build-up on the sides of the fruiting dome.
Set your sprayer to create as fine a mist as possible. You do not want large droplets or pools of water on the surface of the fruiting substrate.
How much you will need to mist also depends on the ambient humidity and the amount of ambient airflow in your growing space. You can skip a day of misting if there is excessive humidity build-up on the sides of the fruiting dome or if there is water pooling on the surface of the mycelial mat.
Ideally, you want to put as much (clean) airflow as possible through the controlled dome environment, but you also want the highest humidity possible in the controlled dome environment.
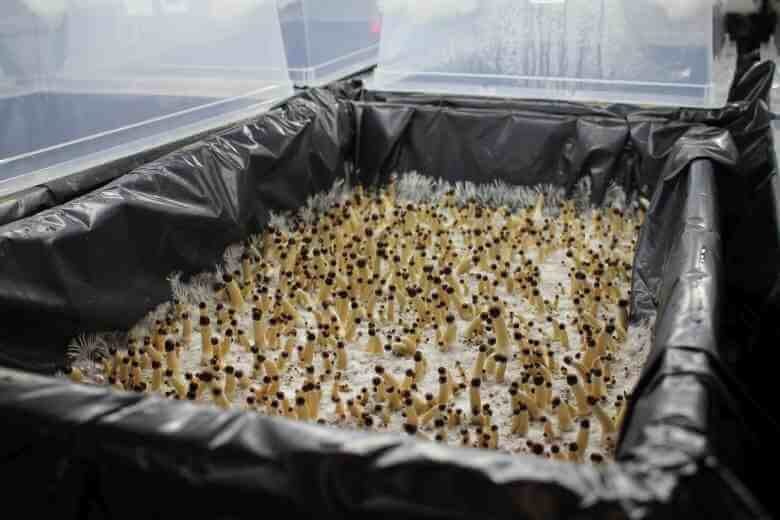
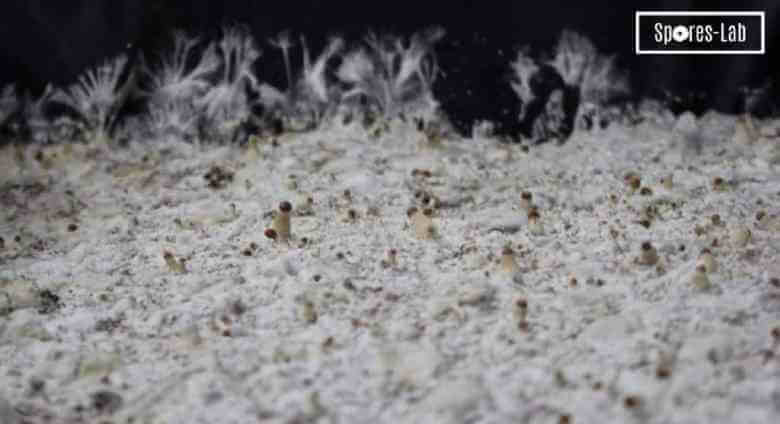
After approximately seven to ten days in these conditions, small primordia or “pins” will form. These will quickly grow into mature fruiting bodies within three to five days.
You should cease misting the surface of the fruiting substrate once pins begin to show, but still try and keep the humidity as high as possible in the fruiting container. You can do this by misting the sides of the dome (instead of directly misting the surface of the substrate).
STEP 8: Harvesting
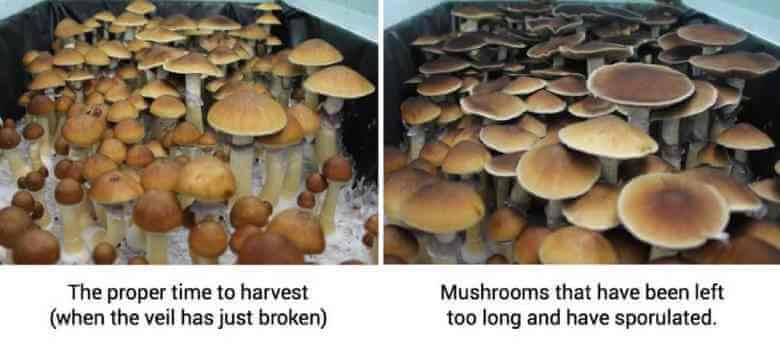
You are now at the most enjoyable and rewarding part of the cultivation process! You should aim to harvest your fresh mushrooms right after the “veil” separating the cap and stem breaks, and the cap begins to open.
If you allow the cap to open, the mushroom will sporulate and cover the surface of the cap with black spores. This does not affect the potency, and is no issue to your health, however mushrooms that have sporulated do not look as appealing.
To harvest, start by gently grasping mushrooms near the base and removing them from the substrate with a twisting and pulling motion. If some mushrooms give you trouble, or there are very dense clusters, you can cut the mushrooms cleanly off at the base of the stalk (as close to the substrate as possible) using sharp scissors or a scalpel. Scissors with slightly curved blades work excellently.
Also try not to touch the surface of the mycelium when harvesting, wear gloves when harvesting, and try to handle the mushrooms the least amount possible. Ideally you should only use scissors if you are forced to.
You should be harvesting a few mushrooms almost daily, as some caps will open before others. When all the mushrooms in a “flush” have been picked, you can mist the surface of the fruiting substrate again to keep the humidity as high as possible for the next flush.
Successive flushes will continue to happen until the mushroom culture has used all of the available nutrients and moisture in the fruiting substrate. Typically, a home/hobby cultivator should be happy with two to three flushes before contamination starts to appear, at which point the culture needs to be disposed of. If you are cultivating in a cleanroom environment, you can get up to five or six flushes.
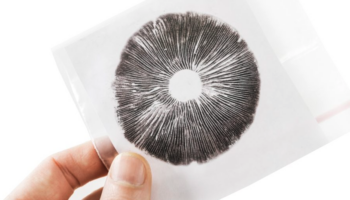
If you will be taking a spore print, you will need to let the thin gelatinous membrane (veil) separating the cap and stem fully break. Then cut the cap off close to where the stem meets the cap, and place the cap on a piece of tin foil. Leave the cap on the tin foil in a sealed container for about 12 hours.
It also helps if the temperature in the space is cooler. You will get a thicker and more uniform print if you can drop the temperature below 65F (18C).
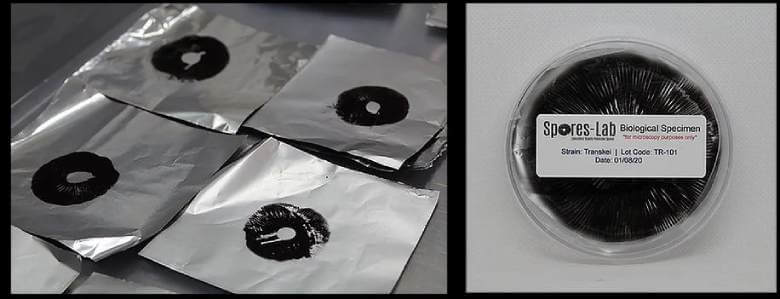
When you return, remove the cap from the tin foil and the spore print will have been deposited. You can now scrape the spores into a sterile aqueous solution to make a spore syringe!
One of the really cool (and sustainable) things about growing mushrooms is that, if you are intelligent about it, you only need to buy genetics once.
Please note that Spores Lab supplies are only available to Canadians. If you’re based in the USA and would like to see a video tutorial covering the same content as this article, or are looking to source growing equipment, supplies, cultured genetics, or magic mushroom kits, check out our How to Grow Mushrooms Course and Grow Kit for everything you need to get started.
Remember to always look for reputable sources, as some mushroom spore sellers on Amazon have been known to deliver contaminated materials.
Whoever you choose, whatever species of mushroom you choose—truffles, pleurotus, morels, or psilocybe cubensis—remember to have fun and release the expectation of perfection. As a first time grower, you may face a few challenges, but the fruit is worth the labor.
Jeff Lebowe is an amateur mycologist and lifelong mycophile living in beautiful British Columbia. He has been deeply involved in the psychedelic mushroom space for several years, and his passion for writing about both the scientific & the more metaphysical aspects of these psychologically and spiritually healing fungi is a direct result of his own psilocybin experiences. He is the founder of Psilopedia, an online resource offering information on mushroom taxonomy, pharmacology, cultivation, and research, along with directories of doctors/therapists offering psychedelic therapy services, and businesses offering Psilocybe related products. He is also the founder of Spores-Lab, the leading Canadian provider of Psilocybe genetics, growing mediums, and other legal Psilocybe products. He has several years of agaricus mushroom cultivation experience, an extensive knowledge base on many species of bioactive fungi, and is dedicated to propagating both knowledge and the tools necessary to cultivate your own plant medicine. His work with fungi has been featured in Merry Jane, Double Blind, High Canada Magazine, and now The Third Wave. In his (little) spare time, he enjoys mushroom foraging, gardening, backcountry skiing, investigative journalism, psychedelic-experimentation, and attempting to quantify said experimentation through creative expression.
Please note that all Spores Lab products are only available for shipping within Canada.
This guide uses affiliate links. Third Wave receives a small percentage of the product price if you purchase through any affiliate links. Read our ethics and affiliates policy here.
Grow 1 Year's Worth of Microdoses in Just 6 Weeks
Third Wave partnered with top mycologists to create the world’s easiest and best mushroom growing program (kit, course, and expert support).
- Pre-sterilized and sealed
(ready to use out of the box) - Step-by-step video and text course
- Access to growing expert in community
- Make your first harvest in 4-6 weeks
- Average yield is 1 - 4 ounces (28-108g)
- Fits in a drawer or closet
- Enter info for Third Wave discounts:


Grow 1 Year's Worth of Microdoses in Just 6 Weeks
Third Wave partnered with top mycologists to create the world’s easiest and best mushroom growing program (kit, course, and expert support).
- Pre-sterilized and sealed
(ready to use out of the box) - Step-by-step video and text course
- Access to experts in community
- Make your first harvest in 4-6 weeks
- Average yield is 1 - 4 ounces (28-108g)
- Fits in a drawer or closet
- Enter info for Third Wave discounts






This is the way to go!
Being a disabled veteran with ptsd and having been on just about every psych med that the VA has to offer I’m at the realization that trauma which I suffer from will never be treatable with psch meds. It’s not a chemical inbalance the ailment is only something that hallucinogens can treat.
I’ve been to rehab 15 times since getting out of the military.
I’m taking a different route starting now!
Thanks for everything
QUESTION: should this be 4 L instead of 40L? 1/2 cup of calcium carbonate for every 40L of verm/coco mix.
Very informative and useful,
Wanting to grow in Ontario Canada!
Begin by mixing the vermiculite and coconut coir at a 50/50 ratio. Next, add 5L of peat moss, 1L of worm castings, and 1/2 cup of calcium carbonate for every 40L of verm/coco mix.
QUESTION: should this be 4 L instead of 40L? 1/2 cup of calcium carbonate for every 40L of verm/coco mix.
Same question 40L seems like a lot.
I have thirdwave mycelium bags with spores injected. Temperature is 78 degrees
It’s been a week and I don’t see any growth but a lot of condensation. Is that normal?
Hi Mitchell.. Were you able to see mycelial growth in your spore bags within a few days after your comment/question here?
Hello,
I find your tutorial very informative, and I intend to follow it step by step.
However, there is something missing. It says:
“Begin by mixing the vermiculite and coconut coir at a 50/50 ratio. Next, add 5L of peat moss, 1L of worm castings, and 1/2 cup of calcium carbonate for every 40L of verm/coco mix.”
Yet, nowhere in the tutorial is the volume/weight of vermiculite or coconut coir written. The recipe says to add proportion of 50% of each, but what their weight or volume (as mentioned for other ingredients) ?
Regards
This is the way to go! thank you